Learning & Development: Digital animation - In the frame
Marianne Sargent
Tuesday, May 18, 2010
Camera, action - shoot your own animated film for computer in the nursery. Marianne Sargent explains.
The profile of ICT within the curriculum is rising, especially in light of the Cambridge and Rose reviews of the primary National Curriculum. With the requirement that ICT is more thoroughly integrated within subjects across the curriculum and the prospect of primary schools becoming more technological, it is important that young children are introduced to a wide range of software from an early age.
The following activity involves the use of a digital camera and Microsoft Windows Movie Maker 2 to create a stop-motion animation. It provides a step-by-step overview of the process to help alleviate anxiety for practitioners who are less confident with ICT.
The example uses Movie Maker 2 because it is free to download from the internet. The box shows more child-friendly alternative suggestions.
Step 1:
Choose something simple to animate
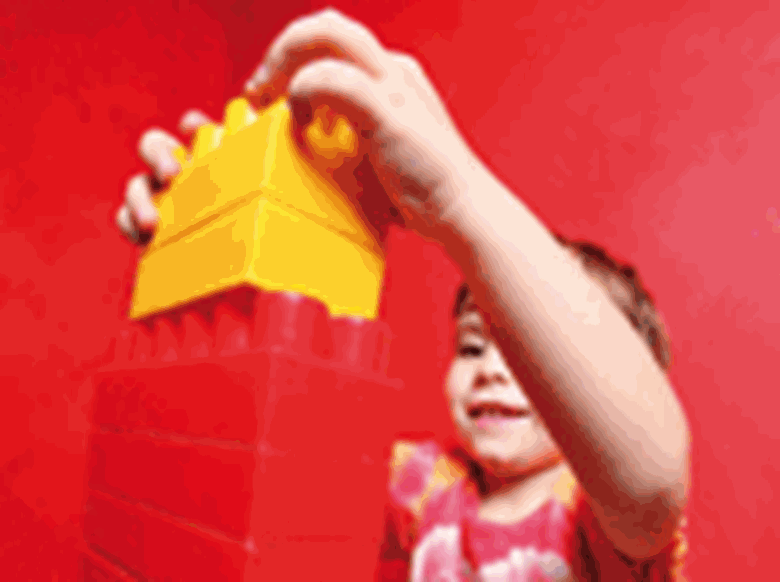
The easiest resource for young children to animate is a construction set, such as Lego, Brio, Duplo or Popoids. Such sets make it easy for children to build up a picture gradually, by adding a brick at a time.
Creating an animation is a long drawn out process, so you might find it easier if you allow children to add two or three bricks between frames. The more bricks added, the quicker the process. However, take care not to add too many each time, because this may result in the final animation appearing disjointed.
Step 2:
Take a series of photographs
Set up a digital camera on a sturdy surface. Ensure that you have a good clear view of the area where you will set up the model for animation.
It is important that the camera is not moved at all during the animation process, so it is a good idea to either use a camera stand or stick the camera down using Blu-tack.
Ask the children to lay down three bricks from the chosen construction set as a start to building a model. As with the camera, it is important that the model is situated in the same place throughout the process. It may help to secure a tray or piece of paper to the table or floor to act as a marker and help the children keep the model in the same place.
Once the model is complete, transfer your series of photographs from the camera to the computer and save them in their own file.
Step 3:
Load the pictures into Windows Movie Maker 2
If you do not have Windows Movie Maker 2 installed on your setting's computer network, you can download it for free from the internet. The Movie Maker screen has a video player on the right, a menu on the left and a storyboard running along the bottom.
To load your series of photos into the program, go to the menu on the left and click on Import Pictures. Find your folder of photos, and select all of them at once by clicking on the first picture and then holding down shift while clicking on the last picture. All the files will be highlighted. Click on Import and the photos will appear in the middle of the screen.
Step 4:
Create your storyboard
The photos now need to be loaded on to the storyboard at the bottom of the screen. Involve the children in this process; take small groups and show them how the program works.
Select all the photos at once using the shift button, as explained above, and drag them all down to the storyboard. The pictures will appear in sequence across the storyboard and you will notice the first picture showing on the video screen.
Step 5:
Polish up the animation
If you press play on the video player, the animation will begin to run. You will notice that it runs very slowly at this stage - each picture or frame will remain on the screen for five seconds before changing to the next. This needs speeding up to make the animation run more smoothly. To do this, click on Show Timeline; the storyboard will change appearance and you will be able to see a timeline running above the pictures.
Click on the magnifier to enlarge the timeline. To change the duration of each frame, click on the picture and move the mouse over the right edge; a red arrow will appear. Click on this arrow and drag it backwards until the duration reads about half a second. Do this with all the pictures. Now press 'play' on the video player and you will see that the animation runs a lot quicker.
To add music and sound effects, go to Import Audio or Music on the menu on the left and add these to the timeline in the same way that you did the pictures. It is also possible to add a title slide by going to Edit Movie and selecting Make Titles or Credits.
Further ideas
- - Provide plasticine or playdough for the children to make simple models that can be manipulated and moulded for animation.
- - Use large wooden building blocks to build a large-scale model. Take photos of it at various stages and animate these.
- - Use junk such as food cartons and containers instead of conventional construction materials.
- - Create an animated story using classroom character toys or puppets.
- - Freeze a large block of coloured ice and take periodical photos of it melting. These can be animated in reverse order for a thoughtprovoking sequence.
- - Grow a beanstalk; photograph the original bean in a glass jar as it germinates, then continue to follow its progress after it has been planted.
SUGGESTIONS FOR ALTERNATIVE SOFTWARE
Digital Blue Movie Creator: This is a simple piece of equipment to use and it cuts out the added burden of having to move your photographs from camera to computer. The software is easy to navigate and accessible to young children.
2Animate: From 2Simple software, this is another uncomplicated program that allows children to draw a series of their own pictures on the computer before stringing them together to create an animation. There is also an option to upload photos.
LEARNING OUTCOMES
Find out about and identify the uses of everyday technology
Know how to operate simple equipment
Complete a simple program on a computer
Show confidence in linking up with others for support and guidance
Display high levels of involvement in activities
Consistently develop a simple story
Use their imagination in art and design