Enabling Environments: All about ... Growing your own vegetables
Mary Whiting
Tuesday, January 6, 2009
There's a lot to learn, and enjoy, from growing vegetables at any early years setting, and there's always a space for it, as Mary Whiting explain.
Growing food in nurseries and schools is nothing new, but now there's an extra dimension. A worldwide food crisis is on the way, it seems, chiefly because of dwindling reserves of oil (needed for transport, machinery and making fertilisers) and water (without which, nothing grows). Expanding populations, degradation of farmland and increasingly extreme and unpredictable weather patterns compound the situation.
This was all spelled out at a big London conference last year called 'Can London Feed Itself?', organised by Sustain, the alliance that campaigns for better food and farming. We learned of different ways we could help ourselves by growing some of our own food: on balconies, on flat roofs, on land around blocks of flats - and in school grounds.
It can be surprising how much food a nursery can grow. Deep, raised growing beds, chest-high to the children, are recommended so crops are easily tended and cannot be trampled accidentally. These can simply be sturdy wooden troughs filled with good quality soil-based compost which can stand on any surface. The best ones I have seen are on 'feet' with drainage holes underneath.
One nursery I visited had raised beds on grass, with thick layers of bark chippings around them to keep mud at bay and with high metal arches over them, so crops could be covered with netting, to deter pigeons, or with horticultural fleece in winter.
The educational benefits of growing vegetables are many (see box). Almost every nursery should be able to grow something, and it may well inspire parents. So how to begin?
Survey Your Site
All food plants need at least half a day's sun, so site the beds in your sunniest place. You can improvise smaller ones by using half-barrels, large plastic pots, piles of car tyres and even dustbins or sturdy plastic sacks. Salad leaves and herbs can be grown in 15cm-deep pots or window boxes, securely fixed to strong wall brackets.
Growing in Containers
Big containers are best and dry out less quickly. Fill them with good-quality loam or soil-based compost. Add some good garden compost too: use home-made if you have it, but see what your local council can provide.
Each year, replace some of the compost with some soil-enriching matter (see box). Stuff car tyres with newspaper for warmth and to save on compost, then stand them in a pile on thick fabric. All other containers need good drainage holes underneath.
When planting them up, use the whole area, surrounding larger plants with smaller ones such as lettuce, rocket, basil or marigolds.
Starting in Open Ground
If you are putting beds on open ground, choose an open spot where the ground is well drained.
- Mark off a small area to start with, perhaps just three beds, each 2m by 0.5m, with wide paths between them. You will need to be able to work the centre of each bed from the path.
- Clear the weeds. First, skim off small annual weeds and put them into a council compost bin, then dig over the plots, completely removing perennial weeds such as dandelions and thistles.
- Enclose the beds with boarding such as quickly-assembled Link-a-Bord. Fill within 6cm of the top with a mixture of soil-based garden compost (not potting compost) and topsoil, which can be scooped from the pathways around the beds.
Essential Tools
Wherever you decide to grow your vegetables, you will need:
- good quality trowels, watering cans and gloves
- for adults, a good spade, fork and hosepipe
- if possible, water butts.
Easy-to-grow Vegetables
Start planting in March or April, or as soon as the soil surface is dry and the weather mild. Always mark and label where you have sown seeds. Weed often, and water gently but thoroughly in dry weather.
Perpetual spinach (spinach beet) and chard: These are the easiest crops of all! Rake the soil surface until it is smooth and crumbly. Scoop a thin layer of soil off a square patch or a line, then water the area. Plant the seeds about 25cm apart. Replace the soil to cover the seeds, crumbling it finely.
To harvest, cut off individual leaves fairly near the ground with scissors. Try red 'Rhubarb Chard' or the amazing mixed colours of 'Bright Lights'. In mild conditions you could be harvesting some leaves throughout the winter.
Lettuces: Go for loose-leaf kinds such as 'Breakfast Bowl' or Unwins' 'Cut and Come Again' mixed lettuces, so you can cut individual leaves. Sow the seeds as above, but sprinkle them thinly over the area. Thin out to 25cm apart. Keep them moist all the time and watch for slugs. You can make successive sowings throughout the summer.
Radishes: Grow as above, sprinkling the seeds thinly and thinning out those that come up close together. Try 'Scarlet Globe' or the red and white 'French Breakfast'. Keep well watered or they'll be woody. Pull them up when you can see the red part. Sow successively through the summer.
Carrots: Only try to grow carrots if you have good sun and fertile, light soil or compost; sandy soil is ideal. Sow as above, but about 1cm deep, and then firm the soil. From late spring to early summer, surround the area with a 50cm high barrier of fleece or plastic to deter the low-flying carrot fly pest. Thin out by pulling some carrots up when they are tiny - and enjoy the extraordinary taste! Sowing a crop every two weeks can give you new carrots right into autumn.
Shallots: Very easy. Plant 'sets' (baby shallots) in early spring. Push the sets into the soil 15cm apart, with tips uppermost and just visible. Harvest in July when the leaves begin to yellow. Gently lift them out with a fork and let them dry in the sun.
Broccoli: Try purple or white sprouting broccoli or green calabrese. Dig in plenty of manure and a little lime and firm the soil down well. Start the plants off in small pots of seed compost or good soil. Push two seeds into each pot and keep the stronger seedling. Plant out when they are about 12cm high, 45cm apart. Make a 'saucer' in the soil around each plant for more effective watering. As the plants grow, remove any yellowing leaves. Harvest calabrese in the autumn and sprouting broccoli the next spring: first cut off the head, then the side shoots as they grow, always just above a bud.
Runner beans: Try 'Scarlet Emperor' or 'White Lady'. Beans need plenty of water and 2m-long canes to climb, set up either as a wigwam or in a row, 25cm apart. Start seeds off in small pots at the end of April, with one per pot, pushed in about 3cm. When two big leaves have opened, plant out next to a cane, on its 'inside,' and make a soil 'saucer' as above. Harvest the beans when they're about 15cm long. In autumn, leave a few pods to grow big seeds for next year. Cut down the spent plants, but leave the nitrogen-rich roots in the soil over winter. Then chop them up with a spade.
Peas: Try 'Early Onward'. Plant seeds directly in the soil when it's well warmed up. Peas need rich soil, plenty of water and support. Plant them 5cm deep and 5-10cm apart in three rows that are also 5-10cm apart. Closely surround this triple row with tall, twiggy sticks or with mesh stretched between posts. Keep well watered. Harvest when the pods are plump but not fat. Save a few big peas to plant next year.
Potatoes: In February, buy some 'seed' potatoes; go for 'first earlies' (try Accent, Kestrel or Picasso) which will crop sooner. Place them in egg boxes, with their 'eyes' upwards, in a light, cool place. When they have sprouted stubby green shoots, plant them out, 15cm deep, 30cm apart. As they grow, keep heaping up soil around them, leaving just the leaves showing.
For tubs, plant one potato per 10-litre tub, half filled with compost; cover with 10cm of compost. If you keep topping up with compost, you'll get a tubful of potatoes!
When the plants have flowered, carefully dig up your potatoes with a fork. Spread them out to dry in the sun, then store them in a cool, dark, airy place. Remember that all green parts of potato plants are poisonous.
Tomatoes: You can either grow these from seed (try saving your own) if you start them off in small pots on a windowsill in March, or buy young plants in May. Try 'Gardeners' Delight' or 'Sweet 100' for small, sweet fruit, or the yellow 'Sungold'. Select sturdy-looking ones, and plant them 45cm apart in good compost and water well.
Except for bush-types such as 'Tornado' or 'Gold Nugget', put a 1m stake by each plant, tie in the stem every 20cms, and keep nipping off the side shoots as soon as they appear, whether at the base or between the leaf stalk and the stem - but only adults should do this, and wash your hands afterwards, as all green parts of tomato plants are poisonous. When four trusses of flowers have grown, cut off the plant's tip. Keep permanently moist and, after the flowers have appeared, feed fortnightly with tomato fertiliser.
Easy-to-grow Fruit
Fruit plants will last for years. The easiest are:
Rhubarb: Plant the 'crowns' in late autumn in well-improved soil with the buds just below the surface, 1m apart. Keep well watered and mulched with manure or compost. Pull off whole stalks as needed, taking just two or three from each plant at a time. The leaves are poisonous.
Blackberries: Have a 'wild' bramble patch or train the briars along any structure. On the top of a wall, briars can help deter intruders! Trim only if you need to.
Wild strawberries: Plant in semi-shade and pick as needed. To avoid overcrowding, cut off and replant the new plants that have rooted on the 'runners'.
Raspberries: Plant the canes in well-drained soil, 45cm apart, and tie to strong supports. After harvesting, cut down the canes that bore the fruit and tie in the new canes for next year. In summer, protect the fruit from birds with netting.
Redcurrants: Plant a bush or two in well-manured soil. Protect the fruit from birds as above. Prune the centre to open it out if the branches get too dense.
Grapes: Plant a vine (or grow cuttings) near a south-facing fence or wall and tie it in securely. Keep it very well-watered and mulched with rich compost. In late autumn each year, keep one main stem and cut all the side shoots back to two buds. After five years there will be grapes every summer!
Planning a Vegetable Garden
Rotate your crops to avoid disease build-up. Using a three-year cycle, rotate in this order:
- Year 1: legumes (beans, peas)
- Year 2: brassicas (cabbages, broccoli, radishes, rocket) and roots (carrots, shallots, garlic)
- Year 3: potatoes, tomatoes, courgettes, chard and anything else.
If possible, have a fourth bed for easy perennial plants such as rhubarb and asparagus, soft fruit (red and blackcurrants and raspberries) and perennial herbs (chives, sage, thyme, marjoram).
Start a Compost Heap
An important early job is starting a compost heap. Local councils supply economically priced compost bins, or you can make one by tying or nailing old pallets together and lining the sides with flattened cardboard boxes. It must stand on soil so worms can get in.
Fill it with greenery (to supply nitrogen) such as raw fruit and vegetable waste, non-seeding, non-perennial weeds and (some) grass cuttings. Also add lots of 'brownery' (to supply carbon, and to prevent sliminess), such as straw, spent crops, eggshells, and shredded paper, card and egg boxes.
Cover the heap with something waterproof (not carpet, as it will contain toxic flame retardant). Keep adding more stuff and turn the heap with a fork every few months. If it gets dry, water it; if it's too wet, add more 'brownery'. When it's full, start a second heap. After about 18 months, the first bin will have compost ready to use; add any unrotted bits to the new heap.
Note that leaves take more than two years to rot down, so save them separately for leaf compost ('leafmould').
- Mary Whiting is a former nursery and infant teacher, author of The Nursery Food Book and Managing Nursery Food (www.nurseryworld.co.uk/Books) and a keen gardener.
CASE STUDY: TALL TREES KINDERGARTEN
Growing vegetables sets children on 'a hands-on, interactive learning journey,' says Emma Comer, owner and manager of Tall Trees Kindergarten in Frome, Somerset.
Since opening in October 2006, children at the 51-place nursery have been involved in every step of growing, harvesting and cooking the home-grown produce. They feed peelings to the nursery guinea pig or add them to the wormery. The nursery provides suits and Wellingtons to give the children year-round access to the outdoors.
'Children need to have hands-on experiences. It's how they learn, and that is what we try to give them,' says Mrs Comer. 'They weed, pick, scrub, peel and chop the vegetables, and they're learning through every step of the process.'
The nursery has 1.5 acres of land, three-quarters of it at the back. There it has created six raised beds, all bordered with branches and separated by gravel paths.
This year the nursery has grown carrots, onions, corn, beetroot, marrows, runner beans and, in the small greenhouse, tomatoes and aubergines.
The children also grow their own herbs, including parsley, thyme, rosemary and chives. They cut and chop them and add them to the bread that they make in nursery.
Slugs have been kept at bay by using only hay, sand and traps, while the children made a scarecrow to deter birds.
Growing vegetables helps children to develop healthy eating habits and be more adventurous with food, believes Mrs Comer. When the nursery made sandwiches with cheese and home-grown beetroot, 'not a single child said they didn't want one'. The sometimes 'bizarre' shapes of the home-grown vegetables also provide a welcome contrast to supermarket produce and an insight into what vegetables sometimes look like.
Gardening expertise is not essential, adds Mrs Comer. 'We did a lot from common sense and what little we did know and went from there, and we had a collection of vegetables for the children to grow, pick and eat.'
More Information
- Grow Your Own Veg by Carol Klein (Mitchell Beazley) - invaluable on everything to do with growing vegetables and salads.
- The Fruit Garden Displayed (Royal Horticultural Society) - impeccable advice.
- The Royal Horticultural Society website, www.rhs.org.uk - has advice on all types of gardening. It has a (free access) Grow Your Own Veg section, plus an online calendar of what to do when. There is also help for schools who register with them.
- Link-a-Bord (www.linkabord.co.uk, tel: 01773 590566) - sells various depths of recycled plastic boards for easily assembled raised beds.
- Join a local gardening/allotment society for discounts on seeds, compost and so on.
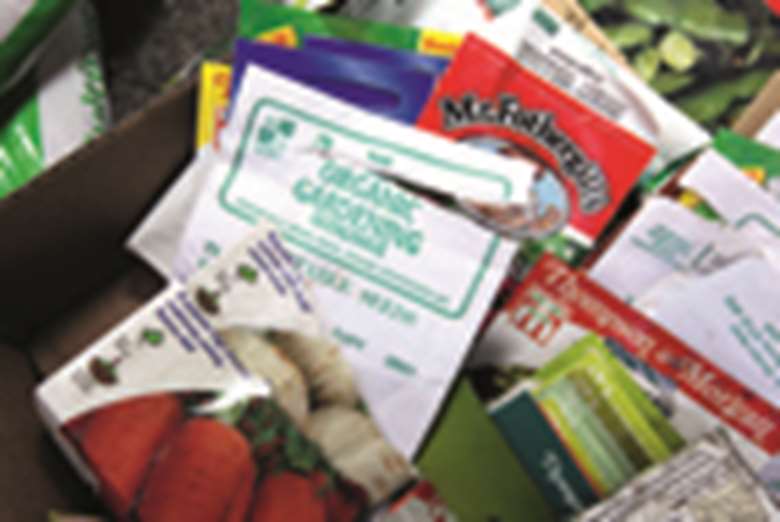
- Seed and plant companies include: chilternseeds.co.uk, fothergills.co.uk, greengardener.co.uk, organicgardening catalogue.com, realseeds.co.uk, suffolkherbs.com, Unwins' seeds: gardenhealth.com.
- Sustain www.sustainweb.org.
- Omlet (www.omlet.co.uk) can supply egg-laying chickens and moveable, fox-proof chicken houses with runs.
Enrich the Soil
Each year, improve your soil by digging in:
- a bucket of well-rotted organic matter (compost and/or manure) per m2, but two buckets if you are growing cabbages, broccoli and spinach;
- a handful of bonemeal per m2;
- 70g general fertiliser containing NPK (nitrogen, phosphorus and potassium) and at least 7 per cent of each per m2, but 100g for runner beans and 140g for brassicas.